Introduction
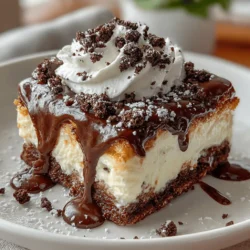
No-bake desserts have carved a special niche in the world of sweet treats, captivating dessert lovers with their simplicity and ease of preparation. These delightful concoctions require minimal kitchen equipment and no time spent in an oven, making them perfect for those who want to whip up something delicious without the fuss of traditional baking. Among the myriad of no-bake dessert options, the Decadent No-Bake Oreo Icebox Cake stands out as a favorite for its rich flavors and creamy texture, making it an indulgent treat for any occasion.
Imagine layers of crunchy Oreo cookies interspersed with a velvety cream filling, all coming together to create a dessert that is as visually appealing as it is delicious. This recipe is not only a crowd-pleaser but also incredibly versatile, appealing to both children and adults alike. Whether you’re hosting a birthday party, a family gathering, or simply looking to satisfy a sweet tooth, this no-bake cake guarantees to impress your guests and leave them asking for seconds.
Understanding No-Bake Desserts
So, what exactly are no-bake desserts? As the name suggests, these are sweet creations that require no baking. Instead of traditional cooking methods, they often rely on refrigeration, allowing ingredients to meld together into a cohesive and delightful treat. The appeal of no-bake desserts lies in their quick preparation and minimal cleanup. With no need to preheat an oven or handle hot pans, these recipes save time and reduce kitchen mess, making them perfect for busy days or spontaneous gatherings.
No-bake desserts come in various forms, from creamy cheesecakes to fruit tarts and chocolate mousse. They can also cater to a range of dietary preferences, including gluten-free and vegan options, offering something for everyone. The Decadent No-Bake Oreo Icebox Cake fits seamlessly into this category, showcasing the delightful combination of cookies and cream in a simple yet sophisticated manner.
Ingredients Breakdown
To create the Decadent No-Bake Oreo Icebox Cake, you’ll need a handful of simple ingredients, each playing a crucial role in building the flavor and texture of this delightful dessert. Here’s a detailed breakdown of what you’ll need:
1. Oreo Cookies: The star of the show, Oreo cookies serve as both the base layer and the primary flavor contributor. Their rich chocolate flavor and creamy filling provide an irresistible contrast to the lightness of the cream filling.
2. Heavy Whipping Cream: This ingredient is essential for achieving the light and fluffy texture that characterizes the cream filling. When whipped, heavy cream adds volume and a luscious mouthfeel, elevating the overall experience of the cake.
3. Powdered Sugar: To sweeten the cream filling, powdered sugar is used. Its fine texture allows it to dissolve easily, ensuring a smooth and creamy mixture without any graininess.
4. Vanilla Extract: A splash of vanilla extract enhances the flavor profile of the cream filling, adding depth and a hint of warmth to the overall dessert.
5. Cream Cheese: Cream cheese adds richness and creaminess to the filling. Its slight tang balances the sweetness of the other ingredients, creating a well-rounded flavor.
6. Granulated Sugar: Used to sweeten the cream cheese, granulated sugar helps to achieve the perfect balance of flavors in the filling.
7. Milk: This ingredient is necessary for dipping the Oreo cookies, softening them just enough to create that signature layer of creamy goodness.
8. Optional Chocolate Syrup: For those who want to take their Oreo Icebox Cake over the top, a drizzle of chocolate syrup can be added for extra indulgence and visual appeal.
Step-by-Step Instructions for the Perfect Oreo Icebox Cake
Now that you’re familiar with the ingredients, it’s time to dive into the step-by-step instructions for preparing the Decadent No-Bake Oreo Icebox Cake. The first crucial step is preparing the cream filling, which is key to achieving that perfect balance of flavors and textures.
Preparing the Cream Filling
1. Begin by chilling your mixing bowl and beaters in the refrigerator for about 10-15 minutes. This step is essential for whipping the cream, as cold equipment helps the cream to whip up more efficiently.
2. Once your equipment is chilled, pour the heavy whipping cream into the mixing bowl. Using an electric mixer, beat the cream on medium speed until it starts to thicken. This usually takes about 2-3 minutes.
3. Gradually add the powdered sugar and vanilla extract to the cream while continuing to whip. As you beat the mixture, watch for soft peaks to form. Soft peaks mean that the cream is whipped enough to hold its shape but still remains smooth and creamy.
4. In a separate bowl, beat the cream cheese and granulated sugar together until smooth and creamy. This step is important, as it ensures that there are no lumps in your filling.
5. Once the cream cheese mixture is smooth, gently fold in the whipped cream. Use a spatula to combine the two mixtures carefully, ensuring that the lightness of the whipped cream is preserved. This folding technique is crucial to maintaining the airy texture of the filling.
6. Your cream filling is now ready! It should be light, fluffy, and bursting with flavor, making it the perfect counterpart to the Oreo cookies.
Techniques for Achieving the Perfect Whipped Cream
To achieve the perfect whipped cream, there are a few techniques to keep in mind. First, ensure that your heavy whipping cream is cold—this is vital for achieving the desired volume and texture. Additionally, avoid over-whipping, as this can lead to a grainy texture and even butter formation. The goal is to achieve soft peaks that hold their shape without becoming overly stiff.
With the cream filling prepared and the essential techniques in mind, you’re well on your way to assembling the Decadent No-Bake Oreo Icebox Cake. Stay tuned for the next steps, where we will guide you through the assembly process and tips for the ultimate presentation.
{{image_2}}
Mixing the Cream Cheese
To achieve the perfect creamy filling for your Decadent No-Bake Oreo Icebox Cake, it’s essential to mix the cream cheese correctly. Start by ensuring your cream cheese is softened to room temperature. This step is crucial because cold cream cheese is difficult to blend smoothly, leading to a lumpy filling. Use an electric mixer on medium speed to beat the cream cheese until it’s light and fluffy. This process helps incorporate air, enhancing the overall texture of your cake.
Tips for Ensuring the Cream Cheese is at the Right Consistency
– Timing: Leave the cream cheese out for about 30 minutes before you plan to mix it. This will allow it to soften adequately.
– Microwave Trick: If you’re short on time, you can microwave the cream cheese for about 10-15 seconds, but be cautious not to melt it.
– Texture Check: You want the cream cheese to be smooth and spreadable, similar to a thick frosting. If you see any lumps, continue mixing until they disappear.
Importance of Blending Flavors for a Creamy Filling
Once the cream cheese is adequately mixed, it’s time to blend in the other ingredients. Typically, this includes powdered sugar, heavy cream, and vanilla extract. The powdered sugar not only sweetens the filling but also helps stabilize it when whipped. Vanilla enhances the overall flavor, making it richer and more complex. Make sure to mix these ingredients just until they are combined; over-mixing can lead to a grainy texture.
Folding to Maintain Airiness
After blending, folding in the whipped cream is the next critical step. Folding is a gentle mixing technique that helps maintain the airiness of the whipped cream, which in turn contributes to the cake’s light texture. To fold, use a spatula to lift the mixture from the bottom of the bowl and gently turn it over. Repeat this motion until the whipped cream is fully incorporated without deflating it.
Dipping the Oreos
Dipping the Oreos is a fun and straightforward process, but it requires a bit of technique to ensure the cookies maintain their structure. Prepare a shallow dish with milk (or almond milk for a dairy-free option) for dipping.
Technique for Quick Dipping
The key here is to dip each Oreo quickly—just a second or two on each side is enough. This rapid dip ensures that the cookies absorb some moisture without becoming overly soggy. Over-soaking can make the Oreos fall apart, ruining their structural integrity in the layers.
Layering the Cake
With your cream cheese filling ready and Oreos dipped, it’s time to assemble your cake. Start by placing a layer of dipped Oreos at the bottom of a rectangular or square baking dish.
Tips for Even Layers
– Use a Spatula: Spread a layer of the cream cheese mixture over the Oreos using a spatula. Aim for an even distribution to create a uniform layer.
– Visual Appeal: For a beautiful presentation, consider alternating the direction of the Oreos in each layer. This technique creates a more visually appealing pattern when you cut into the cake.
– Repeat: Continue layering until you run out of ingredients, finishing with a layer of cream cheese on top.
Chilling Process
Once your cake is assembled, it’s essential to chill it properly. The chilling time allows the flavors to meld together and the filling to set.
Importance of Chilling Time
Chilling is crucial for achieving the right texture; a properly chilled cake will slice cleanly and hold its shape. If you serve it too soon, the filling may be too soft, leading to messy slices.
Recommendations for Optimal Chilling Duration
Aim for at least 4 hours in the refrigerator, although overnight chilling is best for maximum flavor and texture. If you’re in a hurry, at least two hours can work, but keep in mind that the longer it sits, the more delicious it becomes.
Presentation Ideas for Serving
When it comes to serving your Decadent No-Bake Oreo Icebox Cake, presentation is key to impressing your guests. Here are a few ideas to make it as visually appealing as it is delicious.
Suggestions for Elegant Serving
– Individual Dessert Plates: For a sophisticated touch, consider serving individual slices on dessert plates. This allows each guest to have their own portion, making it feel more special.
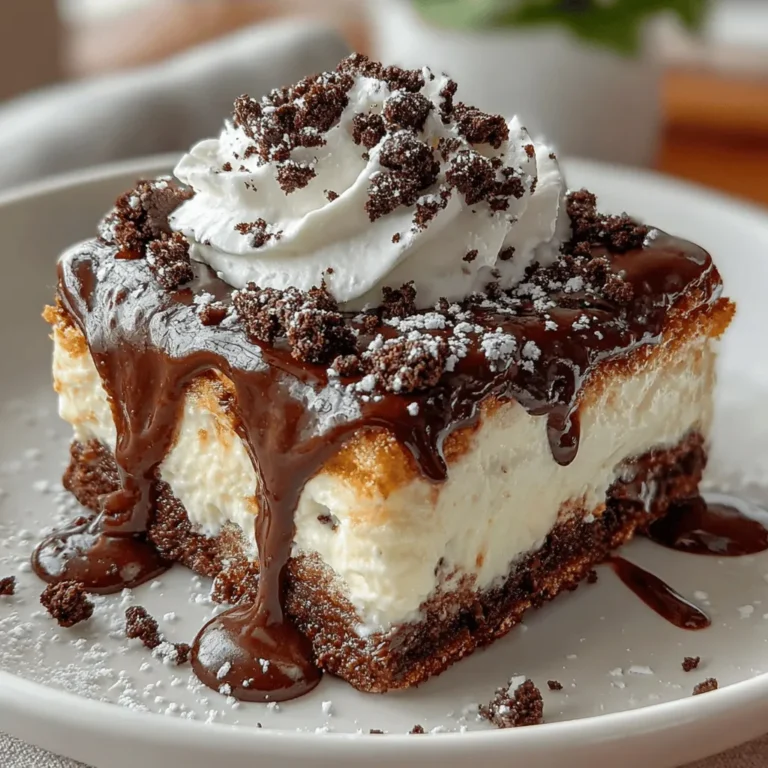
– Garnishing: Top each slice with a sprinkle of crushed Oreos or a drizzle of chocolate syrup for added texture and flavor. You can also add a dollop of whipped cream for extra creaminess.
Tips on Creating a Visually Appealing Dessert Presentation
– Clean Edges: Use a warm knife to slice the cake, wiping it clean between cuts for neat edges.
– Plating: Consider layering the crushed Oreos and chocolate syrup on the plate before placing the slice on top. This can create a beautiful base that enhances the overall presentation.
Nutritional Information
Understanding the nutritional aspects of your dessert can help you make informed choices, especially if you’re serving guests with dietary restrictions.
Overview of Nutritional Aspects of the Dessert
Each serving of this Decadent No-Bake Oreo Icebox Cake contains a rich blend of flavors and textures. The primary ingredients—cream cheese, heavy cream, and Oreos—contribute to its indulgent nature. While it’s certainly a treat, moderation is key.
Suggestions for Ingredient Substitutions for Dietary Considerations
– Gluten-Free Options: If you or your guests are gluten-sensitive, consider using gluten-free Oreos. They are widely available and maintain the same delicious flavor.
– Dairy-Free Alternatives: For a dairy-free version, substitute cream cheese and heavy cream with vegan cream cheese and coconut cream.
Conclusion
The Decadent No-Bake Oreo Icebox Cake is a simple yet sophisticated dessert that is sure to impress family and friends. With its rich layers and delightful flavors, it’s perfect for any occasion, whether a family gathering, a potluck, or a special celebration.
We encourage you to try this recipe and share it with loved ones. The joy of creating and sharing delicious desserts is unparalleled, and this cake is sure to become a favorite in your household. Enjoy the process and the delightful outcome!


