
Homemade dinner rolls have an undeniable allure that captures the hearts and palates of many. The warm, inviting aroma that fills your kitchen as they bake is just a prelude to the comforting experience of pulling apart a soft, fluffy roll. There’s something inherently satisfying about crafting these delightful morsels from scratch, and when you add a touch of honey butter glaze, they become irresistible. Whether served alongside a cozy family dinner, during holiday feasts, or as an everyday treat, these rolls elevate any meal.
At the heart of any great recipe lies the importance of quality ingredients. The flavors and textures of your dinner rolls hinge on the components you choose. Using high-grade all-purpose flour, fresh active dry yeast, and real butter can make all the difference. Each ingredient plays an essential role in creating that perfect balance of flavor and texture, ensuring your rolls are not just good, but extraordinary.
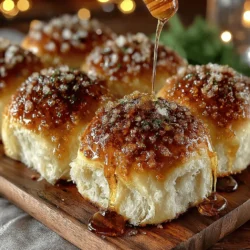
The concept of honey butter glaze introduces a delightful sweetness that complements the rich, buttery flavor of the rolls. This glaze is simple yet transformative, enhancing the overall experience. As the rolls bake, the honey butter creates a glossy, golden sheen that not only looks appealing but also adds a touch of sweetness to each bite. This combination is particularly festive and makes these rolls suitable for a variety of occasions—from casual family dinners to grand holiday gatherings.
The Magic of Honey Butter Glazed Dinner Rolls
These dinner rolls are the epitome of comfort food: soft, fluffy, and slightly sweet, they are sure to become a staple in your home. Their light, airy texture invites you to enjoy them straight out of the oven, while the honey butter glaze offers an extra layer of indulgence. The rolls are versatile enough to complement savory dishes, such as roasted meats and hearty soups, while also being delicious enough to stand alone as a sweet treat.
The pairing of honey and butter is significant in baking for several reasons. Honey adds a natural sweetness that is both subtle and profound, while butter provides richness and moisture. Together, they create a harmonious blend that enhances the overall flavor profile of the rolls. This combination is not only delicious but also offers a nostalgic quality; it evokes memories of family meals and special occasions, making these rolls a fitting choice for any gathering.
Whether you’re planning a holiday celebration, hosting a dinner party, or simply looking to enjoy a comforting treat at home, these honey butter glazed dinner rolls are an excellent choice. Their inviting aroma, soft texture, and sweet glaze make them a showstopper on any table.
Ingredients Breakdown
Understanding each ingredient’s role in your honey butter glazed dinner rolls is crucial for achieving the best results. Let’s break down the essential components of this recipe:
– All-Purpose Flour: The foundation of your rolls, all-purpose flour provides the necessary texture and structure. It contains the right balance of proteins to form gluten when kneaded, giving your rolls their delightful chewiness.
– Active Dry Yeast: This ingredient is the magic behind the rising dough. When activated, the yeast ferments and produces carbon dioxide, which causes the dough to expand and become light and airy. Fresh yeast is vital for achieving the desired rise, so always check expiration dates for optimal results.
– Whole Milk: Milk adds moisture and flavor to your rolls. It also contributes to a richer dough, resulting in a softer texture. The fat in whole milk enhances the flavor and keeps the rolls from becoming dry.
– Granulated Sugar: This ingredient serves two purposes: it adds sweetness and helps activate the yeast. Sugar feeds the yeast during fermentation, promoting a faster rise and creating a lighter roll. It also contributes to the beautiful golden color of the finished product.
– Salt: While it may seem counterintuitive to add salt to a sweet recipe, it plays a crucial role in flavor balance. Salt enhances the sweetness of the sugar and helps control the fermentation of the yeast, ensuring a well-risen dough.
– Unsalted Butter: Butter is essential for richness and moisture. It adds a luxurious texture and enhances the flavor of the rolls. Using unsalted butter allows you to better control the salt content in the recipe.
– Egg: Eggs act as a binding agent, helping to hold the ingredients together. They also add richness and contribute to the overall texture of the rolls, producing a tender crumb.
– Honey: The star of the glaze, honey provides natural sweetness and a beautiful shine to the finished rolls. Its floral notes complement the richness of the butter, creating a delightful flavor combination that will keep everyone coming back for more.
Step-by-Step Instructions
Activating the Yeast
The first step in creating your honey butter glazed dinner rolls is activating the yeast. Begin by warming your whole milk to a temperature of about 110°F (43°C)—just warm enough to touch but not hot, as excessive heat can kill the yeast. Once the milk is warmed, add a tablespoon of granulated sugar and the active dry yeast. Stir gently to combine and let it sit for about 5 to 10 minutes. During this time, you should see the mixture begin to foam and bubble, indicating that the yeast is alive and ready to work its magic in your dough.
Combining Dry Ingredients
While the yeast is activating, it’s time to prepare the dry ingredients. In a large mixing bowl, combine the all-purpose flour and salt. Mixing these ingredients thoroughly ensures that the salt is evenly distributed throughout the flour, which is crucial for the flavor of your rolls. Once the yeast mixture is frothy, you can add it to the bowl of dry ingredients along with the melted unsalted butter, beaten egg, and the remaining granulated sugar.
Incorporating these ingredients carefully will set the foundation for your rolls. As you mix, you should begin to see the dough come together. The key here is to create a cohesive mixture without overworking it at this stage.
These initial steps set the stage for the fluffy, sweet rolls that will soon grace your table. With the yeast activated and the dry ingredients combined, you are well on your way to creating a batch of honey butter glazed dinner rolls that will delight family and friends alike. Stay tuned for the next steps in this delicious baking adventure!
{{image_2}}
Continuing from the preparation of your Honey Butter Glazed Dinner Rolls, let’s dive into the process of mixing the dough, kneading it to perfection, and baking those delicious rolls that will surely impress your family and friends.
Mixing the Dough: Techniques for Achieving the Right Consistency
Start by combining your dry ingredients—flour, sugar, yeast, and salt—in a large mixing bowl. It’s crucial to whisk these ingredients together thoroughly to ensure even distribution of the yeast and salt, which are vital for fermentation and flavor. Next, heat your milk until it’s warm but not boiling (about 110°F or 43°C). This temperature is ideal for activating the yeast without killing it. Gradually add the warm milk to the dry ingredients, then mix in melted butter and eggs.
When mixing, you can use a wooden spoon or a stand mixer fitted with a dough hook. If you’re using a stand mixer, start at a low speed to prevent flour from flying everywhere, then gradually increase to medium speed. Mix until the dough begins to come together and pulls away from the sides of the bowl. The dough should be slightly tacky but not overly sticky. If it’s too sticky, slowly add more flour, one tablespoon at a time, until you achieve the right consistency.
Kneading the Dough: Tips for Ensuring a Smooth and Elastic Texture
Once your dough has come together, it’s time to knead. Transfer the dough to a clean, lightly floured surface. Knead the dough by folding it over itself and pushing it away with the heel of your hand. Rotate the dough a quarter turn and repeat this process. You’ll want to knead for about 8 to 10 minutes until the dough is smooth and elastic. A well-kneaded dough should spring back when you gently poke it. If you find it hard to knead by hand, you can continue using the stand mixer for about 5 minutes on medium speed.
Kneading is essential as it develops the gluten, which gives the rolls their structure and chewiness. If you’re new to kneading, don’t worry—just be patient and pay attention to the texture of the dough.
First Rise: The Importance of Temperature and Environment for Dough Rising
After kneading, form the dough into a ball and place it in a greased bowl, turning it so that the top is lightly coated with oil. Cover the bowl with a clean kitchen towel or plastic wrap. The first rise is crucial for developing flavor, and the ideal environment is a warm, draft-free area. If your kitchen is cool, you can create a warm spot by preheating your oven to the lowest setting for a few minutes, then turning it off and placing the dough inside with the door slightly ajar.
Let the dough rise until it has doubled in size, which typically takes about 1 to 1.5 hours. This patience pays off, as the longer the dough ferments, the more flavor it will develop.
Shaping the Rolls: Techniques for Achieving Uniformity in Size and Shape
Once the dough has risen, it’s time to shape the rolls. Gently punch down the dough to release the gases, then turn it out onto a lightly floured surface. Divide the dough into equal pieces, typically about 12 to 16, depending on how large you want your rolls. A bench scraper is helpful for this task, as it allows for clean cuts.
To shape each piece, flatten it slightly, then tuck the edges into the center, creating a round ball. Roll it between your palms to smooth it out. Place the shaped rolls in a greased baking dish or on a lined baking sheet, ensuring they are close together but not touching. This will help them rise upwards instead of spreading out.
Second Rise: Importance of Patience for Perfect Puffiness
Cover the shaped rolls with a towel or plastic wrap again, and let them rise for about 30 to 45 minutes. They should puff up and nearly double in size. This second rise is critical for achieving the soft and airy texture that defines perfect dinner rolls. While waiting, you can preheat your oven to 350°F (175°C) to ensure it’s hot and ready for baking.
Preheating the Oven: Timing Your Baking for Best Results
Preheating your oven is an essential step in baking. It ensures that the rolls start baking immediately once they are placed in the oven, promoting an even rise. While the oven is preheating, you can prepare the honey butter glaze. This simple mixture will add a sweet, buttery finish to your rolls.
Baking the Rolls: Visual Cues for Knowing When They’re Ready
Once the second rise is complete and the oven is ready, place the rolls in the oven and bake for 15 to 20 minutes. Keep an eye on them during the last few minutes of baking. You’re looking for a beautiful golden-brown color. The rolls should also sound hollow when tapped on the bottom. If you have a kitchen thermometer, the internal temperature should reach around 190°F (88°C) when they are fully baked.
Preparing the Honey Butter Glaze: Creating the Perfect Balance of Flavors
While the rolls are baking, prepare the honey butter glaze. In a small bowl, mix softened butter with honey until well combined. The ratio can be adjusted to your personal preference—more honey for a sweeter glaze or more butter for a richer, creamier taste. You can also add a pinch of salt to enhance the flavor balance. This glaze will not only add sweetness but also keep the rolls moist and add a beautiful sheen.
Glazing the Rolls: Techniques for Even Distribution of Glaze
Once the rolls are out of the oven, immediately brush the honey butter glaze generously over the tops of the hot rolls. The heat from the rolls will melt the butter, allowing it to soak into the warm dough. Be sure to coat them evenly, ensuring every roll gets a taste of the delicious glaze.
Serving Suggestions: Enhancing Presentation and Enjoyment
These Honey Butter Glazed Dinner Rolls are perfect for any occasion, from family dinners to holiday feasts. Serve them warm, fresh out of the oven, alongside a variety of dishes. They pair beautifully with roasted meats, hearty soups, or even as a complement to a fresh salad. For an elevated presentation, consider arranging the rolls in a decorative basket lined with a linen cloth. You could also drizzle a bit of extra honey over the top before serving for an extra touch of sweetness.
Tips for Perfect Honey Butter Glazed Dinner Rolls
– Texture and Flavor Adjustments for Different Preferences: You can experiment with your flour choice. For a slightly nuttier flavor, try substituting some of the all-purpose flour with whole wheat flour. If you prefer a richer taste, consider adding a bit of milk powder to your dry ingredients.
– Substitutions for Dietary Restrictions: For gluten-free options, use a 1:1 gluten-free flour blend that includes xanthan gum. Be aware that gluten-free dough may require different hydration levels and may not rise as much as traditional dough.
– Storage and Reheating: To keep your rolls fresh, store them in an airtight container at room temperature for up to two days. For longer storage, freeze them in a zip-top bag. Reheat in a warm oven for about 10 minutes, or microwave them briefly if you’re short on time.
Presentation Ideas
– Creative Ways to Present Your Rolls at the Table: Consider using a rustic wooden board or a colorful platter to serve your rolls, making them the centerpiece of your table.
– Use of Garnishes to Elevate the Visual Appeal: Fresh herbs such as thyme or rosemary can be placed around the rolls for a pop of color and added aroma.
– Pairing Suggestions: These rolls can be paired with a variety of wines, such as a light Chardonnay or a fruity Pinot Noir. They also complement soups like butternut squash or chicken noodle, and fresh salads, enhancing the overall dining experience.
Conclusion
Making Honey Butter Glazed Dinner Rolls is not just about baking; it’s an experience filled with the joy of creating something delicious from scratch. The process of mixing, kneading, and baking embodies the love that goes into homemade food, and the delightful aroma wafting through your home will surely make your family eager to gather around the table.
The simple pleasure of breaking bread—especially rolls that are soft, buttery, and sweet—is what brings people together. We encourage you to try this recipe, whether for a special occasion or as a comforting addition to your weekly meals. These rolls can easily become a cherished family tradition, shared during gatherings and celebrations. So roll up your sleeves, gather your ingredients, and enjoy the delightful journey of baking Honey Butter Glazed Dinner Rolls!